Lab 4 a, b, i, and j - DNA Lab:
Purpose:
1. Make 10 ml 5M NaCl solution
2. Make 100 ml TE buffer: 10 mM TRIS, 1 mM EDTA
3. To observe the appearance and unique properties of DNA by spooling it out of a solution.
4. To observe DNA or any part of DNA recovered during isolation.
5. Prepare and pour agarose gel for DNA fragment analysis.
6. Observe appearances of different DNA samples on an agarose gel.
|
Materials:
Lab 4a:
|
Lab 4b:
|
Lab 4i:
|
Lab 4j:
|
|
Procedure:
Day 1: 1. Determine mass of NaCl to be measured to give a 5 M concentration for 10 ml of the solution. 2. Put NaCl in 15 ml conical tube. Add distilled water until solution's volume is 10 ml. 3. Cap 15 ml conical tube. Label and keep in 4 degrees Celsius until ready to use. 4. Determine mass of TRIS to be measured to get correct concentration and volume in TE buffer. 5. Determine mass of EDTA to be measured to get correct concentration and volume in TE buffer. 6. Add TRIS and EDTA in correct amounts to 250-ml. 7. Add 80 ml of deionized water and mix until chemicals dissolved. Add NaOH to raise pH until in range (7.5 and 8.5). Use pH paper to determine pH. If solution too basic, add small volumes of 1 M of HCl to lower pH. 8. Add deionized water until total volume is 100 ml. 9. Pour buffer in 125-ml bottle, cap it, label it, and store ate 4 degrees Celsius until ready to use. |
Day 2: 1. Mix 1 ml of DNA with 1 ml of TE buffer. 2. Dilute DNA with TE in beaker; observe. 3. Add NaCl (500 microliters of 5M NaCl). 4. Add 4 ml of Ethanol (trickle down side so careful not to mix solutions); observe. 5. Spool DNA. 6. Put DNA into new tube with 2 ml fresh TE and label. |
Day 3: 1. Determine the mass of agarose to be measured to put in the 1X TAE (TRIS-acetate -EDTA). 2. Add agarose to 100 ml 1X TAE in erlenmeyer flask. 3. Heat to boil and dissolve (heat-swirl-heat-swirl until clear) in a microwave oven. 4. Let cool until you can touch the erlenmeyer flask for a few seconds. 5. Prepare the gel mold by taping the opposite open ends and putting the two combs in. 6. Pour 1X TAE and agarose solution into gel mold and let cool. |
Day 4: 1. Remove tape from gel. Place in gel tank. 2. Pour TAE over gel until covered. Gently remove combs. 3. Prepare samples with micropipet (P-2-20): - 20 ml DNA and 4 microliters 6x loading dye. Spin 2 seconds in centrifuge. 4. Load samples onto gel with micropipet (P-20-200). 5. Put cover on gel tank and plug into power supply. 6. Run at 110V for approximately 45 minutes. 7. Stain for several hours with Ethidium Bromide 8. Rinse and observe with light. |
Here is some of the data and calculations we collected from the lab:
Data Analysis:
Unfortunately, the DNA could not be depicted from our gels. In fact, the entire class' gels did not show DNA. As a class, we brainstormed the possible reasons why all our experiments failed. Her were our possible causes:
1. Stained overnight and the DNA diffused out.
2. Denatured DNA.
3. Dye not loaded correctly.
4. Dye not resuspended before loading in gel.
5. Buffers not made correctly.
6. One of the reagents was bad
We analyzed each of these reasons. Here is the probability of each one:
1. not likely - DNA is too big
2. not likely - stain's purpose
3-5. not likely if happened to everybody in the class
6. possible - the ethidium bromide is light sensitive and could have broken down
After looking at our possible factors that could have manipulated the experiment, we decided to try to fix the experiment with the bad reagent theory. Dr. L.B. was the one one pouring the ethidium bromide into the gel boxes because this chemical contained carcinogens. We started by looking at what components of making the ethidium bromide could have polluted it:
1. Did the time of staining matter?
- Our teacher, Dr. L.B., only had time to stain the first classes' gels for 2 hours, but she stained the second classes' gels for 18 hours. At first, she thought the first classes' gels did not show the DNA bands because it wasn't stained with the ethidium bromide long enough. That theory dropped when the second classes' gels turned out the same way.
2. Was the reagent spoiled?
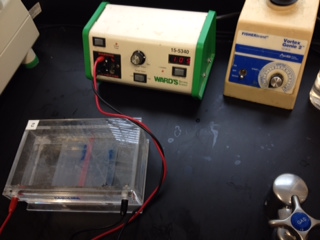
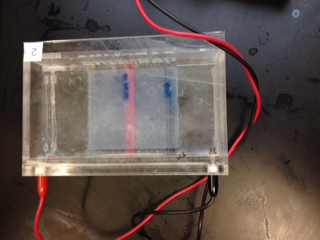
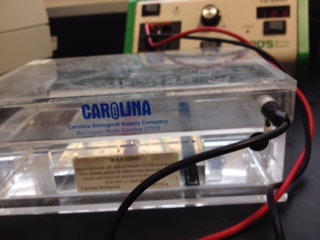
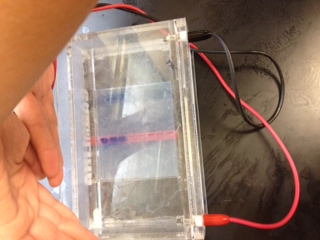
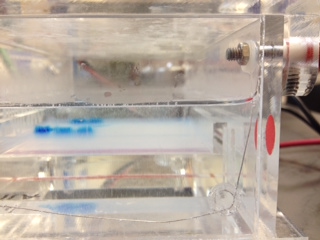
- Dr. L.B. made a 20,000X stock of ethidium bromide last year because because it dangerously carcinogenic. She diluted the 20,000X stock to a 1X solution. This year she made a new 1X solution with the old 20,000 stock of ethidium bromide. Reagents can break down over time because they are very light sensitive. Assuming the reagent was old, Dr. L.B. remade a 20,000X stock of ethidium bromide and diluted it to a new 1X solution. She poured the reagent into 1 gel for about 3 hours. As of now, we haven't heard about the results, but hopefully the DNA bands are visible. We saved all the gels just in case we find a solution to our failed experiment. Here are some pictures of our gel during electrophoresis (movement of charged particles in a fluid or gel under influence of an electric field; used to separate macromolecules - DNA in our case):
Unfortunately, the DNA could not be depicted from our gels. In fact, the entire class' gels did not show DNA. As a class, we brainstormed the possible reasons why all our experiments failed. Her were our possible causes:
1. Stained overnight and the DNA diffused out.
2. Denatured DNA.
3. Dye not loaded correctly.
4. Dye not resuspended before loading in gel.
5. Buffers not made correctly.
6. One of the reagents was bad
We analyzed each of these reasons. Here is the probability of each one:
1. not likely - DNA is too big
2. not likely - stain's purpose
3-5. not likely if happened to everybody in the class
6. possible - the ethidium bromide is light sensitive and could have broken down
After looking at our possible factors that could have manipulated the experiment, we decided to try to fix the experiment with the bad reagent theory. Dr. L.B. was the one one pouring the ethidium bromide into the gel boxes because this chemical contained carcinogens. We started by looking at what components of making the ethidium bromide could have polluted it:
1. Did the time of staining matter?
- Our teacher, Dr. L.B., only had time to stain the first classes' gels for 2 hours, but she stained the second classes' gels for 18 hours. At first, she thought the first classes' gels did not show the DNA bands because it wasn't stained with the ethidium bromide long enough. That theory dropped when the second classes' gels turned out the same way.
2. Was the reagent spoiled?
- Dr. L.B. made a 20,000X stock of ethidium bromide last year because because it dangerously carcinogenic. She diluted the 20,000X stock to a 1X solution. This year she made a new 1X solution with the old 20,000 stock of ethidium bromide. Reagents can break down over time because they are very light sensitive. Assuming the reagent was old, Dr. L.B. remade a 20,000X stock of ethidium bromide and diluted it to a new 1X solution. She poured the reagent into 1 gel for about 3 hours. As of now, we haven't heard about the results, but hopefully the DNA bands are visible. We saved all the gels just in case we find a solution to our failed experiment. Here are some pictures of our gel during electrophoresis (movement of charged particles in a fluid or gel under influence of an electric field; used to separate macromolecules - DNA in our case):
Data Analysis (continued):
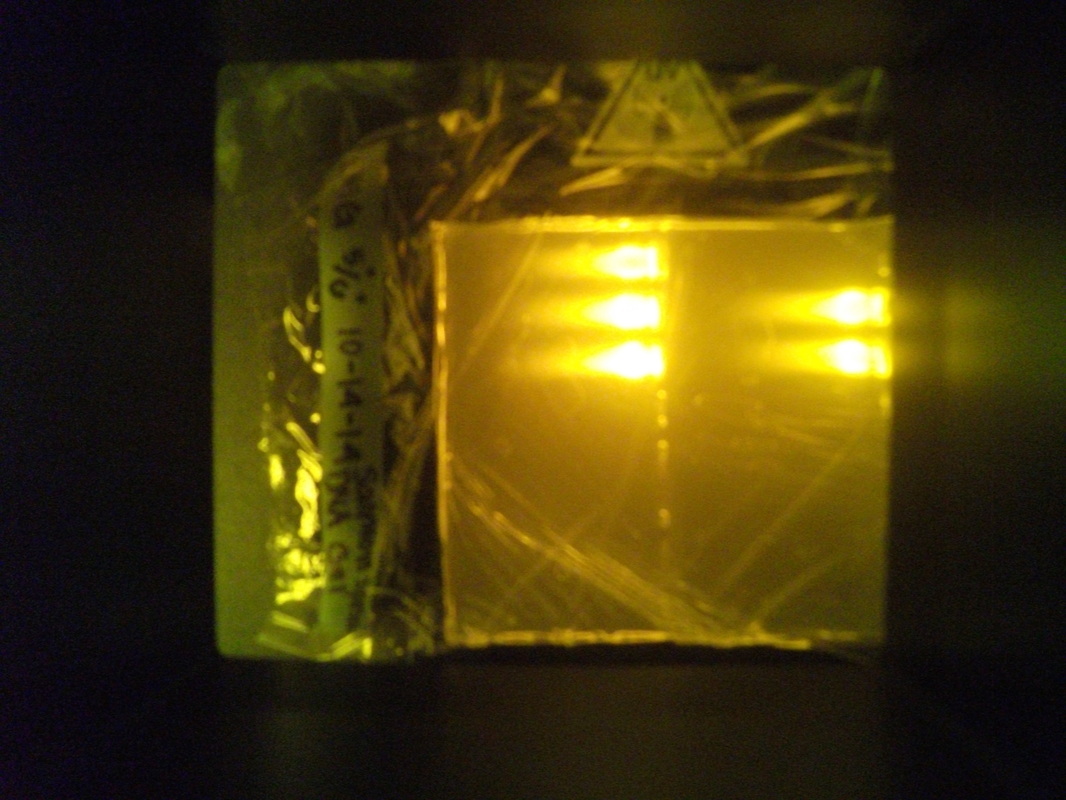
It worked! Our idea to remake the reagent (ethidium bromide) worked! Dr. L.B. made a new stock solution of ethidium bromide then diluted it. We then repeated the process of soaking the gel in the ethidium bromide reagent for several hours. In the UV light, you could see orange bands of DNA in the gel. All of our DNA samples seemed to run the same length and size. The concentration of DNA was thick towards the top of the band (where it started). As the DNA extended, the orange colored DNA band faded out. The DNA bands could clearly be seen but they were smeared rather than crisp, clean lines. Below is a picture of how our gels turned out:
It worked! Our idea to remake the reagent (ethidium bromide) worked! Dr. L.B. made a new stock solution of ethidium bromide then diluted it. We then repeated the process of soaking the gel in the ethidium bromide reagent for several hours. In the UV light, you could see orange bands of DNA in the gel. All of our DNA samples seemed to run the same length and size. The concentration of DNA was thick towards the top of the band (where it started). As the DNA extended, the orange colored DNA band faded out. The DNA bands could clearly be seen but they were smeared rather than crisp, clean lines. Below is a picture of how our gels turned out:
|
Our DNA Bands:
Bronte 1 = Bottom Right Bronte 2 = Top Left Cate = Bottom Left Mikayla = Middle Left Emilie = Top Right |
Conclusion:
Forensic science is a field that includes very hands on work. People every day conduct forensics labs out in the field whether it is determining the murderer or a DNA test to find out if he is the father of the child. Remarkably, this lab we conducted is very useful in the world. Isolating DNA, or also known as purifying the DNA, is a process many underestimate. To receive accurate results in any kind of DNA test, the DNA cannot be contaminated. Scientists can analyze DNA when it is purified. We used the gel as a medium for the DNA. First of all, a gel can suppress thermal convection. Secondly, it can delay the passage of molecules. Finally, it maintains separation so it can be stained with a reagent (ethidium bromide) after the electrophoresis. Isolating DNA and separting it in a gel is quite frequently used in several fields of science. For example, a sample of DNA can tell if a newborn has a genetic disease, help study a gene with cancer, and provide forensic evidence.
Forensic science is a field that includes very hands on work. People every day conduct forensics labs out in the field whether it is determining the murderer or a DNA test to find out if he is the father of the child. Remarkably, this lab we conducted is very useful in the world. Isolating DNA, or also known as purifying the DNA, is a process many underestimate. To receive accurate results in any kind of DNA test, the DNA cannot be contaminated. Scientists can analyze DNA when it is purified. We used the gel as a medium for the DNA. First of all, a gel can suppress thermal convection. Secondly, it can delay the passage of molecules. Finally, it maintains separation so it can be stained with a reagent (ethidium bromide) after the electrophoresis. Isolating DNA and separting it in a gel is quite frequently used in several fields of science. For example, a sample of DNA can tell if a newborn has a genetic disease, help study a gene with cancer, and provide forensic evidence.
Reflection:
This lab was one of the most interesting labs for me this year. Learning about the structure and function of DNA has been so fascinating. This made the lab easier for me. When something is intriguing to you, it motivates you to focus on the lab, which results in more accurate data. THe other members in my group were excited by this unit in Biology as well. Our group consisted of Mikayla DeBarros, Cate Guempel, Bronte Hoefer, and me. This was the same group from the dialysis presentation and previous labs. We work well as a group because we know each other's strength and weaknesses. For example, one person might be experienced in pipetting while another member is skilled in use a balance to get the most precise measurement. By knowing each other's personnel, we could assign different steps to a person assuring it was done correctly. As a group, we were the perfect amount of efficient, if that makes sense. We listened and followed instructions from Dr. L.B. We always completed the task given to us. But we never rushed through the lab. As I said before, forensic science was impressive and stimulating to our group. We were going to savor this up close look at DNA and using the biotech equipment. It's like eating you favorite food. You want to enjoy and cherish every bite so you can make a memory of the delectable taste. We wanted to take advantage of this lab and learn more about DNA and forensics.
About half way through the lab, there was an opportunity to make multiple samples of DNA by splitting the group. Because all of us wanted to be interactive in this lab, we divided our group into pairs (Bronte and Cate, Mikayla and me). Mikayla and I read over the lab manual then started the procedure. We were slow but our results were fairly exact. Cate and Bronte went for it with just Dr. L.B.'s directions, and they forgot a step of adding more NaCl solution. Their results were primarily the same, but it did add an extra layer of stress. Also, during the electrophoresis process, we weren't sure when to unplug the gel from the power source, so we stopped after five minutes. We were quickly informed that it needed to be plugged in for forty-five minutes. Only a "small" difference... It wasn't a huge mistake and was easily fixed, but in the future, we should find out this information before we plug the gel box into the power source. Maybe asking potential questions would help. In a more serious situation, it might be dangerous to be oblivious to such pivotal directions. Imagine wondering if you should have worn gloves and goggles when working with chloroform. That's not gonna be pretty. Time is a scientist's best friend and worst enemy.
This lab did increase my pipetting skill. At first, it seems like such a simple task that requires no thought. Some people do pipet that way, but their results won't be as accurate. There are three main steps to achieve master pipet skills: 1. Set the pipet to the proper measurement. 2. Roll your finger slowly but steady up the pipet pump. 3. No air bubbles in the liquid in your pipet tip. I was a speedy "pipetter" (if that's a word) who always had tiny bubbles in the liquid. I learned in this lab to be precise and methodical about it between pipetting the EDTA, TRIS, 1X TAE, the DNA, and the NaCl solution. Also, when using the micropipet to fill the holes designated holes in the gel with the blue dye and DNA solution, I had to stabilize my shaky hand in such a small space. In terms of making all these solutions, I learned many new techniques. First, we learned the molarity calculations seen in the conclusion. Secondly, we were educated about the table top and analytical balance. Finally, we learned the importance of dissolved solutions. The molarity calculations are vital. As we get older, we will have to make all our own solutions. If one component of the tons of solutions in the lab is wrong, the lab is ruined. With the balances, we learned that larger amounts are measured on a table top balance, and minuscule amounts are measured on analytical balances. Also, we were notified about their fragile state, which helps when working in another lab Breaking lab equipment does not leave a good impression. Not only are the ingredients of solutions important, but how you add them to mixtures is critical. We used a vortexer to ensure the solutions were dissolved. On the other hand, when layering the DNA, NaCl, and ethanol, we needed to be sure the liquids didn't mix so we could discern the DNA in the beaker to spool it. Another skill I worked on in this lab adjusting the pH of a solution. We added drops of NaOH to adjust the EDTA and TRIS to a more basic pH around 7.5 and 8.5. Our group would add one drop at a time then the solution's pH level by dipping in pH test strips. The color scale on the container determine the pH level. I learned to be careful about adding NaOH because it is dangerous and it can make your solution too basic. Then you have to add 1M of HCl to make the solution more acidic, which is a hassle. I think we need to practice these skills and the best way to do it is to have more experience with the equipment. This type of learning can only be done by using your hands and getting them dirty. Hopefully, we have more opportunities this year to work with the biotech equipment.
|
For Fun:
This lab was part of our forensic science project. Forensic science is the scientific method of collecting and analyzing information about the past which is used in a court of law. Anyone watch NCIS? Forensic scientists in that show try to find the criminal by gathering fingerprints, blood, hairs and other possessions that can be tested for the DNA of the criminal. Here's a video of forensic scientists at work. 
|
|
